Thanks for choosing OC Cloud9!

949-699-6619 | 9am – 6pm Monday – Friday : Saturday by Appointment

  • Client Login
    • Outlook Web App
    • Cloud Apps and Desktops
    • Remote Support
OC Cloud9
  • About Us
    • Careers
  • Cloud Services
    • Cloud Software
      • Cloud9 Software QuickBooks Solution
    • Cloud Mail
    • Cloud Collaborate
    • Database Cloud Services
    • Cloud Web Hosting
  • Solutions
    • For Designers – Accelerated
    • For Businesses – Complete
    • For Individuals – Professional
    • HIPAA Compliant Cloud Services
      • Cloud9 HIPAA Email Encryption and Data Loss Prevention
    • For Students – College VDI
  • Support
    • Cloud Support
    • Learning Center
    • Standards & Compliance
    • News & Articles
  • Contact Us
Get Started
  • About Us
    • Careers
  • Cloud Services
    • Cloud Software
      • Cloud9 Software QuickBooks Solution
    • Cloud Mail
    • Cloud Collaborate
    • Database Cloud Services
    • Cloud Web Hosting
  • Solutions
    • For Designers – Accelerated
    • For Businesses – Complete
    • For Individuals – Professional
    • HIPAA Compliant Cloud Services
      • Cloud9 HIPAA Email Encryption and Data Loss Prevention
    • For Students – College VDI
  • Support
    • Cloud Support
    • Learning Center
    • Standards & Compliance
    • News & Articles
  • Contact Us

Windows Client Setup

OC Cloud9 > Support > Cloud Support > Windows Client Setup

Windows Client Setup

How Can We Help?

< Back
You are here:
  • KB Home
  • Cloud9 Apps & Desktops
  • Cloud Apps & Desktops Device Setup
  • Windows Client Setup
Print
Created OnNovember 9, 2018
Last Updated OnSeptember 16, 2019
byMatt Jones

These directions are intended for Occloud9 Cloud customers only. This setup is designed for personal windows computers Windows 7 and higher and is not intended for public computers.
Public computers can connect using the Browser Connect method.

Add Cloud App and Desktop feed Step-By-Step
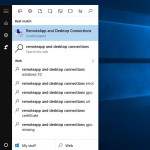
  1. Open the “Remoteapp and Desktop Connections” Control Panel. Using the start menu search type in “Remoteapp and Desktop Connections” (do not include the “)
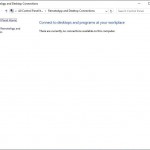
  2. Click on the “Access RemoteApp and Desktops” link on the left side of the window. (note: This may vary depending on your version of windows. The location of the link will be the same)
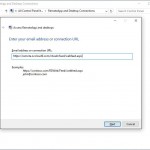
  3. Enter the feed URL https://remote.occloud9.com/rdweb/feed/webfeed.aspx in the field and click next.
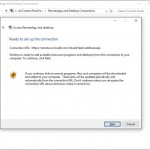
  4. Click the Next button.
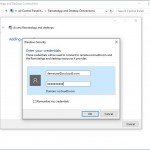
  5. Enter your user name and password. If you do not know this please contact support.
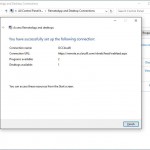
  6. Success! Click on Finish.
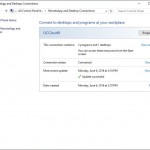
  7. Click on the “View Resources” link.
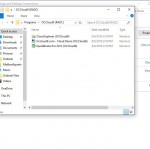
  8. Copy the shortcuts here to your desktop.
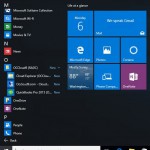
  9. All of your shortcuts will also appear in your start menu under the folder “OCCloud9 (RADC)” (In windows 7 this will be under RemoteApp and Desktop Connections)

1. Open the “Remoteapp and Desktop Connections” Control Panel. Using the start menu search type in “Remoteapp and Desktop Connections” (do not include the “) 

2. Click on the “Access RemoteApp and desktops” link on the left side of the window. (note: this may vary depending on your version of windows. the location of the link will be the same) 

3. Enter the feed URL https://remote.occloud9.com/rdweb/feed/webfeed.aspx in the field and click next. 

4. Click the Next button 

5. Enter your user name and password. If you do not know this please contact support. (note: if you never want to enter your password when connecting check the “Remember my credentials” checkbox) 

6. Success! Click on Finish 

7. Click on the “View Resources” link 

8. Copy the shortcuts here to your desktop 

9. All of your shortcuts will also appear in your start menu under the folder “OCCloud9 (RADC)” (In windows 7 this will be under RemoteApp and Desktop Connections) 

The Screenshots shown are from Windows 10. The same steps apply for Windows 7, Windows 8, and Windows 8.1, however some of the items referenced may be named differently but are in the same locations.

Windows XP and Windows Vista are not supported for Cloud Apps and Desktops.

Previous Web Browser Method
Next Windows Mobile Client Setup
Table of Contents

You might also like

  • 3 Hybrid Cloud Service Trends We’ve Seen In 2022
  • 3 Qualities To Look For in Your Managed Cloud Services Provider
  • QuickBooks in the Cloud: The Sky’s the Limit
  • Database Cloud Services in Orange County: Scale at Will
  • QuickBooks Hosting vs. Desktop: Which is Best for Your Business?
  • Distinguishing Between Public, Hybrid, & Private Cloud Solutions
  • Quickbooks Cloud Hosting: How to Lower your IT Budget
  • Access Advanced Disaster Recovery Measures with QuickBooks Hosting
  • Save Money & Scale With a Private Cloud Infrastructure
  • How Secure Cloud Technology Mitigates DDoS Attacks
  • Cloud Security vs. Legacy IT Security: Which Is More Secure?
  • Important Documentation Required For Cybersecurity Insurance
← Web Browser Method
Android Native Client →

Search Help Center Articles

Cloud Complete Icon

Cloud9 Complete

Help Center
Cloud Exchange Icon

Cloud9 Exchange Mail

Help Center
Cloud Apps and Desktop Icon

Cloud9 Apps & Desktops

Help Center
Cloud Exchange Icon

Cloud9 Email Protection

Help Center

26150 Enterprise Way, Suite 400
Lake Forest, CA 92630

949-699-6619

ADA Accessibility Statement

Sign Up To Receive Our Newsletter